I am currently house sitting for my nan so i thought i would take advantage of this and film another Garden Art.
So
this morning i filmed for 2 hours in the garden. i got a variety of
shots of trees, garden ornaments and close ups of flies, wasps and
butterflies.
i am currently transferring the footage to my laptop where i hope to edit it later.
Showing posts with label video editing. Show all posts
Showing posts with label video editing. Show all posts
Monday, 26 August 2013
Sunday, 18 August 2013
Reviewing Past Projects/learning
I recently made a video for GTA V. i have watched the video quite a
few time and until yesterday i had never seen an out of place frame in
the middle of the video.
The frame i have left is an in between frame where i have seperated 2 pieces of footage. I am annoyed i havent noticed this before but will be on high alert for such mistakes in future.
The frame i have left is an in between frame where i have seperated 2 pieces of footage. I am annoyed i havent noticed this before but will be on high alert for such mistakes in future.
Saturday, 17 August 2013
Banshee New Sheriff Trailer
i decided to do another trailer for the Cinemax TV show Banshee.
This time i took every episode cutting them up scene by scene and deleting the scenes i did not wish to use. i then chopped up my favourite bits and put them over a 2 minute clip of the sheriff being sworn in.
the trailer can be seen here:
http://www.youtube.com/watch?v=hDKrl48kHfo&feature=youtu.be
This time i took every episode cutting them up scene by scene and deleting the scenes i did not wish to use. i then chopped up my favourite bits and put them over a 2 minute clip of the sheriff being sworn in.
the trailer can be seen here:
http://www.youtube.com/watch?v=hDKrl48kHfo&feature=youtu.be
Sunday, 4 August 2013
GTA V Tralier Finished
Finished colour correcting and made all the final adjustments to the video i started yesterday.
See the finished video below.
See the finished video below.
Saturday, 3 August 2013
Learning While Editing
Today while editing in Adobe Premiere Pro i stumbled across a short cut for razoring clips.
My normal way to do this would be to place the guide on the point of the clip that i wish to razor and then select the razor tool and click on top of the guide. Well today i found that i can simply place the guide on the desired point and press cmd + k (Mac) cntrl +k (windows), this simply razors the clip at that point and when using the razor tool a lot as i have been today you save a lot of time using this method.
My normal way to do this would be to place the guide on the point of the clip that i wish to razor and then select the razor tool and click on top of the guide. Well today i found that i can simply place the guide on the desired point and press cmd + k (Mac) cntrl +k (windows), this simply razors the clip at that point and when using the razor tool a lot as i have been today you save a lot of time using this method.
GTA V Trailer
Today i decided to edit an extended version of the upcoming Rockstar game GTA V.
I took all of the existing trailers and mixed them together to make an extended trailer, i swapped out footage from different sections of trailers with other footage. I then extended the soundtrack to the trailers by identifying the track used and replacing it with a long version of the clip.
I split the trailer into 3 sections to focus on the 3 main characters, each with an individual song used in a previous trailer.
The trailer is currently 8 minutes long and i am currently colour correcting it.
Below is a screen shot of me editing footage in Adobe Premiere Pro.

TopBoy Channel 4 Trailer
Yesterday i edited a video for a competition for Channel 4's drama TopBoy.
I edited together a 36 second video consisting of the stock footage provided and added a backing track from the tracks provided.
I submitted the video to Channel 4 for processing and today they uploaded it to their Youtube channel.
Below is a link to the video.
I edited together a 36 second video consisting of the stock footage provided and added a backing track from the tracks provided.
I submitted the video to Channel 4 for processing and today they uploaded it to their Youtube channel.
Below is a link to the video.
Sunday, 14 July 2013
Filming Garden Art
Today I decided that i would get my camera out and film with no real objective.
As it was a nice day i took my camera outside and decided that i would concentrate on plants and flowers. My focus was on getting arty close up shots with pulling focus or zooming in. i also used a lot of shots where i locked the camera off as there was movement in the plant due to a slight breeze.
I am going to edit together all the footage later in sort of a montage of clips style and possibly edited the sound where needed.
Saturday, 6 July 2013
Editing Existing Footage of The TV Show Banshee
Today I edited together some existing footage of the TV show Banshee.
I took episode one and edited it down to a 3 min extended trailer.
I kept the edit sharp and snappy by using quick cuts and shots that were full of action.
I am hoping to do more of these videos for more episodes in the series before finally doing a Season Trailer.
You can view this video on vimeo via the link below.
https://vimeo.com/69754190
Sunday, 2 June 2013
Editing/Colour Correcting Elite Training Video
I've found that as this video was filmed in a garage with no
additional lighting the natural light combined with the florescent bulbs
give everything a blue tint.
To correct this i have combined levels with RGB curves in Adobe Premiere Pro, adjusting the brightness and the blue levels of the clips.
This makes the clips look a lot more natural and makes the images seem sharper and clearer.


To correct this i have combined levels with RGB curves in Adobe Premiere Pro, adjusting the brightness and the blue levels of the clips.
This makes the clips look a lot more natural and makes the images seem sharper and clearer.
Before

After

Saturday, 25 May 2013
Colour Correcting Open Art Stills
I decided that the still images i had used in the open art video were
a little bit dull. so rather than editing them in photoshop which i
felt would be time consuming and would have the same effect of colour
correcting in premiere. I used RGB curves, i upped the brightness and
took down the green colouring as the back ground was a yellow colour,
this made the pictures stand out from the background.

Before
After
Before

After
Before

After

I feel that the pictures are a lot brighter and alot easier on the eye when colour corrected.
Editing Over Exposed Background objects
Right this might seem like a bit of a bodge-job but it worked.
i had a shot that was fine in colour and lighting but was devalued by over exposed white boards in the back of the shot. i tried adjusting the brightness of the clip and colour correcting the clip both of which effected the subjects in the foreground to much making the clip look dull and lifeless.
i then decided that i would overlay the video with itself on the adobe timeline twice, i then cropped out everything except the board to the left applied the tool RGB Curves and adjusted the brightness and colours untill the board was no longer over exposed. i then repeated this technique for the second board.
Before


i had a shot that was fine in colour and lighting but was devalued by over exposed white boards in the back of the shot. i tried adjusting the brightness of the clip and colour correcting the clip both of which effected the subjects in the foreground to much making the clip look dull and lifeless.
i then decided that i would overlay the video with itself on the adobe timeline twice, i then cropped out everything except the board to the left applied the tool RGB Curves and adjusted the brightness and colours untill the board was no longer over exposed. i then repeated this technique for the second board.
Below
you can see the before and after images. This technique worked for me
as the moving foreground images did not at any point in the video cross
the overexposed background image if they had i would have not been able
to use this technique.
Before

After

Before

After

Tuesday, 21 May 2013
Colour Correcting Open Art
Finished Editing the open art video for the Shire Hall Gallery in Stafford.
I Finished off by colour correcting the video making all shots look very natural as can be seen below.

I Finished off by colour correcting the video making all shots look very natural as can be seen below.
Before
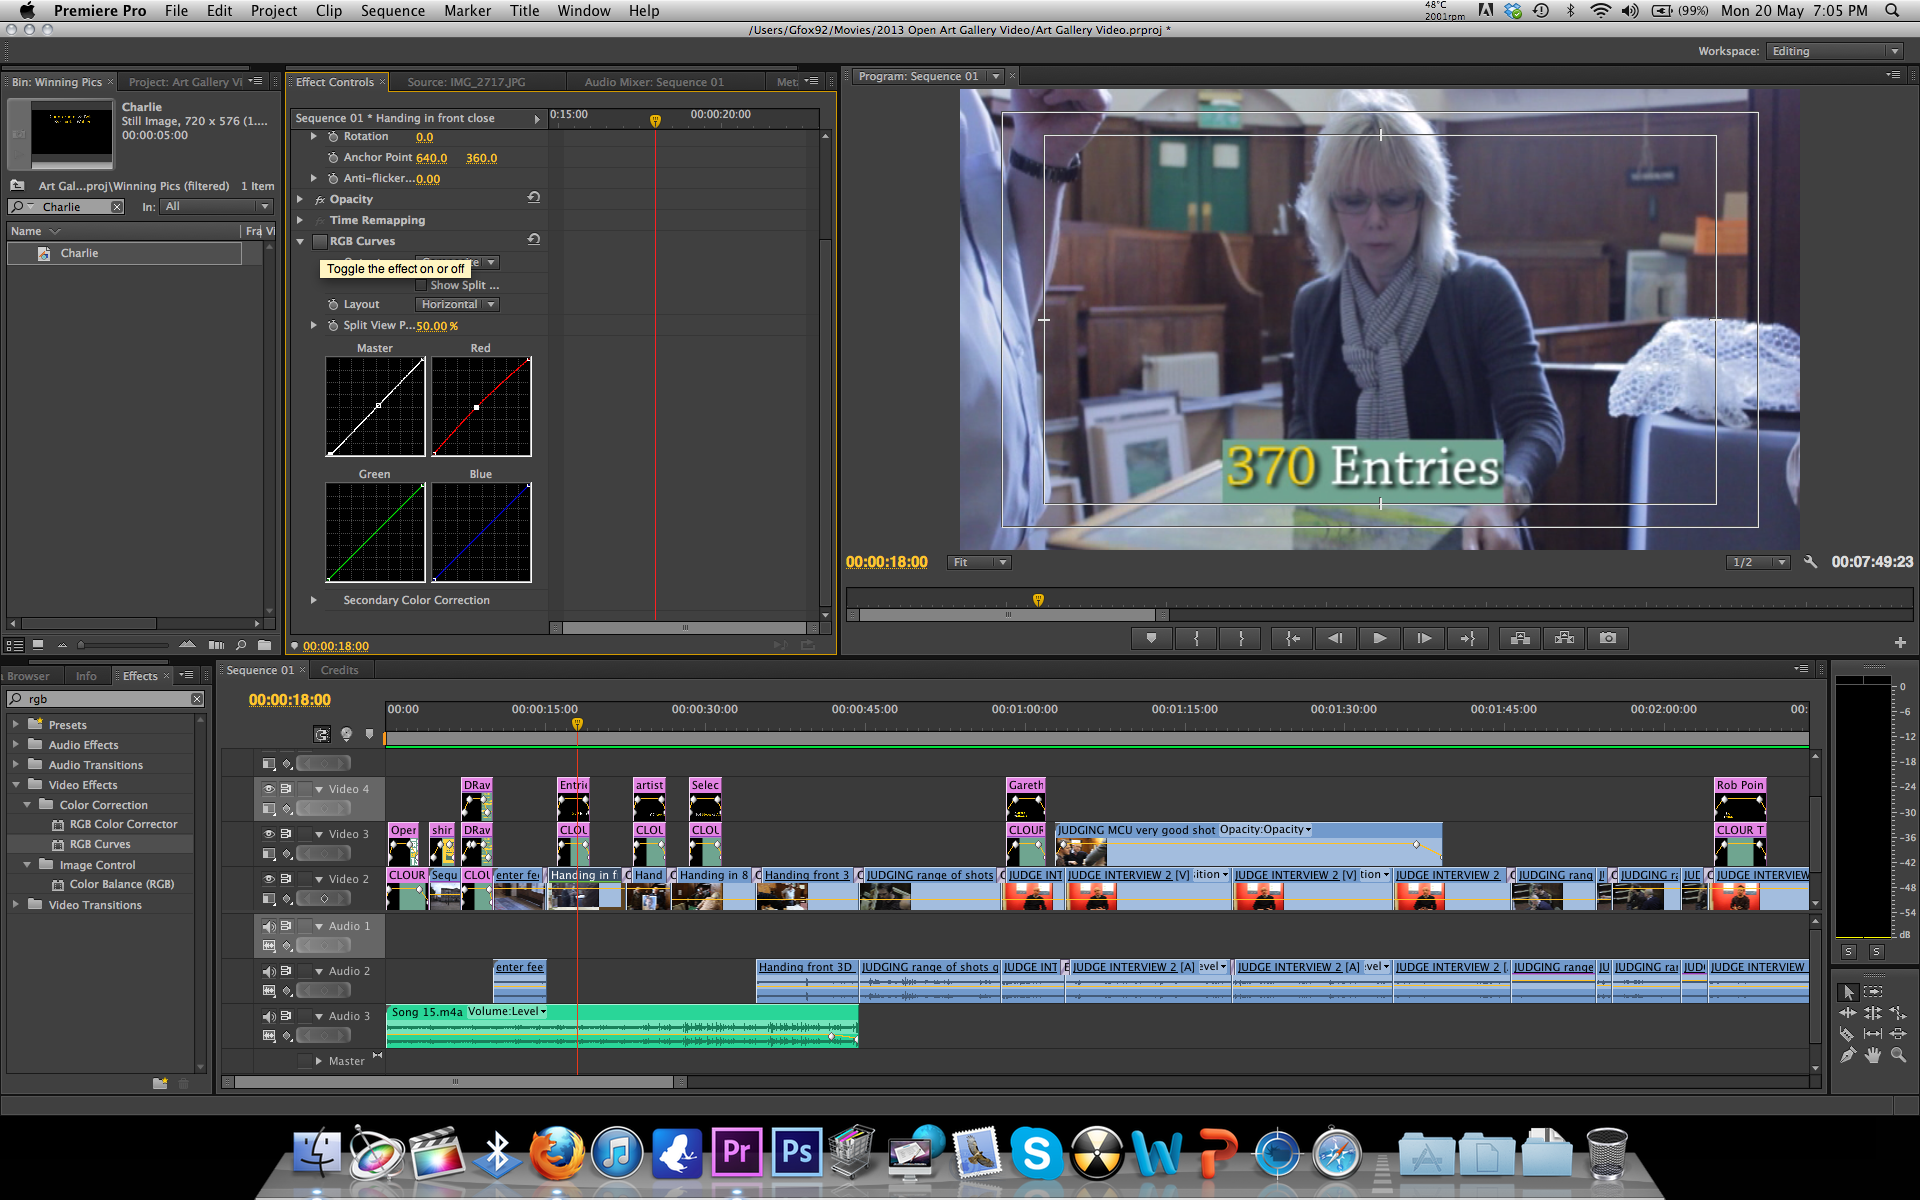
After

Monday, 20 May 2013
Editing Open Art Interviews
Just a quick post as I have just had a revelation while editing.
I know it sounds quite stupid but I have only just realized how important single frames are, I say this because while editing the sound of this interview I realized that by trimming a few frames you can make it sound as though the interviewee, is just talking not answering a question. This is done by trimming the '"erm"s, "well"s and other starting's to sentences making a sentence "erm well I started painting in..." to "I started painting in..."
Simple but effective.
Saturday, 11 May 2013
Filming Drama
Yesterday i filmed the last scene for my drama.
Filming was a success as i got all the footage i needed quickly and efficiently.
I used my Gopro camera again for Point of view shots something that it is perfect for.
i also played about with pulling focus during shots, this is something that i have been cautious of doing before as i have been worried of messing it up but after a couple of attempts i succeeded with the shot which i am very pleased about.
since then i have edited all the footage together. i had a few minor issues with sound which i sorted through splicing together bits of sound from other clips. i then colour corrected the entire project, some shots were very dark but through some minor adjustments the problem was sorted.
Before

After 

Friday, 15 March 2013
Editing foundations to employment
I have now done everything that i can with the audio. I found that
the best solution was for me to lower the volume of the clip and put a
constant grain sound on the clip which masks the annoying background
noise.
Another thing that i have found very useful which I had not used before is the RGB Curves tool in Premiere Pro for colour correcting. A tool i will be using again in future with the Levels tool.
Below are before and after pictures of the colour correcting I have done.


As you can see in the second picture the shadows on the subjects face and background have been reduced and the light in whole looks a lot more natural.
Another thing that i have found very useful which I had not used before is the RGB Curves tool in Premiere Pro for colour correcting. A tool i will be using again in future with the Levels tool.
Below are before and after pictures of the colour correcting I have done.
Before

After

As you can see in the second picture the shadows on the subjects face and background have been reduced and the light in whole looks a lot more natural.
Thursday, 14 March 2013
Editing (foundations to employment)
My Edit for Staffordshire County Coucil's Foundations to Employment is nearly complete
one thing I am tampering is editing the sound in Soundbooth as there is an annoying dog barking sound in the background. unfortunately isolating the sound and deleting it leaves me with choppy unsynced footage.

one thing I am tampering is editing the sound in Soundbooth as there is an annoying dog barking sound in the background. unfortunately isolating the sound and deleting it leaves me with choppy unsynced footage.

Subscribe to:
Posts (Atom)